XPACS Configuration Guide
The tool is configured in two appsettings.json files of XPACS and XPACS Portal correspondingly.
Database
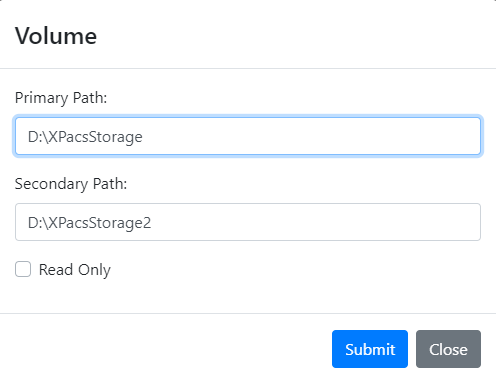
The file storage can be configured via XPACS Portal. Open the portal, go to the Storage page and click the New button to add a new volume or Edit to edit an existing volume. In the opening Volume window, enter Primary Path and the optional Secondary Path of the volume. The write access can be disabled for full volumes by turning the Read Only option on. Finally, click the Submit button. The Delete button allows the user to delete a volume.
The file storage is also configured in the appsettings.json file of XPACS:
| Setting | Default Value | Description |
|---|---|---|
FolderPathPattern |
yy-MM\dd |
Pattern to define the folder structure under StoragePath; folder names are based on their creation dates |
LowSpacePercentage |
5 | Warnings generate in log files if the file storage has free space less than defined here |
The default value of FolderPathPattern defines a two-level hierarchy: the first level encodes by two-digit year, dash, and two-digit month; the second level encodes by two-digit day.
Communication with Modalities
XPACS defines three channels of communication with modalities in the Store, ModalityWorklist, and QueryRetrieve settings of the appsettings.json file of XPACS. Each setting has the following sub-settings:
| Setting | Default Value | Description |
|---|---|---|
AeTitle |
SERVER |
AE title used by modalities to connect with XPACS |
Port |
104-106 |
Port listening on each channel |
There is a root setting:
| Setting | Default Value | Description |
|---|---|---|
AuthorizeClients |
false |
true if each connecting modality should be authorized before communicating via a channel |
Modality Authorization
Modalities can be authorized via XPACS Portal. Open the portal, go to the Clients page and click the New button to authorize a new modality or Edit to edit the authorization of an existing modality. In the opening Client window, enter AE Title of the modality, and the optional Host field if the modality access should be restricted by its IP address. The modality access can be enabled/disabled in the corresponding checkboxes below. Finally, click the Submit button. The Delete button allows the user to cancel the authorization.
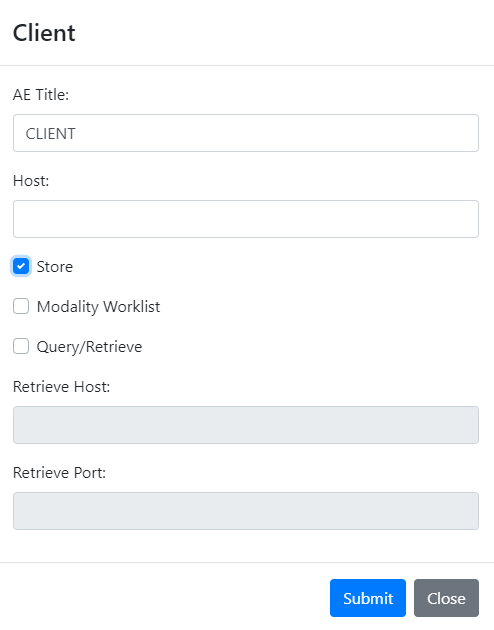
If a modality uses C-MOVE instead of C-GET when retrieving data, both the Retrieve Host and Retrieve Port fields should not be empty.
User Authorization
Portal users can be authorized via XPACS Portal. Open the portal, go to the Users page and click the New button to authorize a new user or Edit to edit the authorization of an existing user. In the opening User window, enter the Name of the user, and its Password with confirmation (Password can be skipped for already existing users). The user type can be changed from the Ordinary value: Administrator implies full access, and Manager implies full access to users and read-only access to clients. The user access can be enabled/disabled on the feature level in the corresponding checkboxes below (if the user type is Administrator then the checkboxes do not matter). Finally, click the Submit button. The Delete button allows the user to remove another user of the same or lower type.
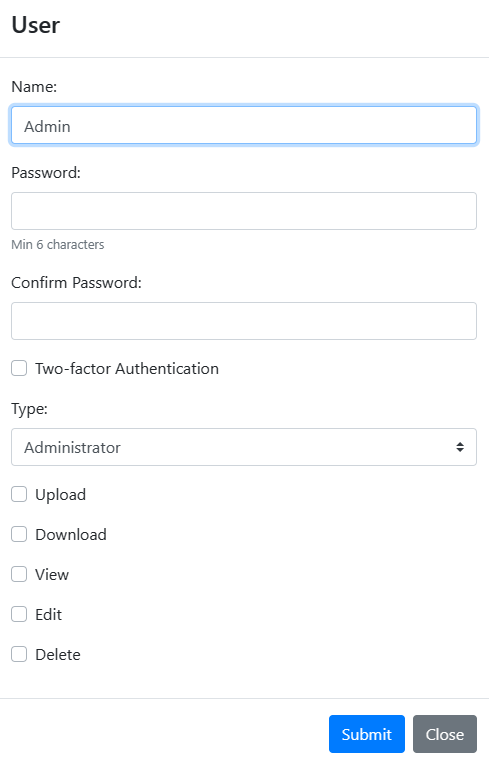
Note! The default XPACS database automatically created on startup will contain user Admin with Administrator type and a random password. The password can be obtained by sending an activation key displayed at the beginning to your XPACS distributor.
Web Portal
There are settings in the appsettings.json file of XPACS Portal:
| Setting | Default Value | Description |
|---|---|---|
StudyPageSize |
100 |
The study list is paginated by this value |
RetentionPeriod |
0 |
An image cannot be deleted until its age reaches this value (in days) |
ImageViewerUrl |
URL to a third-party image viewer; it must include {0} for substituting the Study Instance UID tag value of a viewed study |
The state-of-art AcuScreen viewer can be used by setting ImageViewerUrl to dicom://localhost?DicomServerName=XPACS&StudyUid={0}. The DicomServerName parameter should coincide with AcuScreen settings: Settings window, Network tab, and Name column of the Servers list should coincide.
Upload functionality is implemented in the portal by sending files to XPACS. It is defined in the Store setting with the following sub-settings:
| Setting | Default Value | Description |
|---|---|---|
AeTitle |
SERVER |
AE title used by the portal to connect with XPACS |
Port |
104 |
Port used by the portal to connect with XPACS |
Some strings in the UI can be customized by defining the CustomStrings setting with the following sub-settings:
| Setting | Default Value |
|---|---|
| ComponentName | Component Name |
| ComponentId | Component ID |
| ComponentManufacturingDate | DOM |
| AccessionNumber | Accession # |
| ComponentOwnerName | Component Owner |
| RequestedJobId | Job ID |
| RequestedJobDescription | Job Description |
| StudyId | Study ID |
| StudyDescription | Description |
| SeriesDescription | Description |
| ProtocolName | Protocol Name |
HTTPS Protocol
An SSL certificate is required to be used by the HTTPS protocol. The certificate is registered in XPACS Portal.
Prepare Self-Signed SSL Certificate
Create a private key and X509 certificate:
openssl req -x509 -newkey rsa:2048 -nodes -keyout private.pem -out cert.pem
Convert the certificate file to a pfx file:
openssl pkcs12 -export -in cert.pem -inkey private.pem -out xpacs.pfx
Prepare Authorized SSL Certificate
Run Certbot to automatically get free HTTPS certificates. Follow instructions to create a certificate for an XPACS host in the command line and renew it automatically before it expires.
Open folder /etc/letsencrypt/live/<hostname> and convert the certificate file to a pfx file:
openssl pkcs12 -export -in fullchain.pem -inkey privkey.pem -out xpacs.pfx
Re-run this command after the certificate expired and place a new version of the file in the location mentioned below.
Register SSL Certificate
Add the following Kestrel setting into the appsettings.json file of XPACS Portal:
  "Kestrel": {
    "Certificates": {
      "Default": {
        "Path": "xpacs.pfx",
        "Password": "pwd"
      }
    }
  }
String xpacs.pfx is an example of the certificate file path (it is relative to the portal start-up folder). For instance, place the file in the same folder. Use the password used when the certificate file was created instead of the pwd string.